
Cisco’s Identity Services Engine (ISE) allows network and security teams to implement policy enforcement and weave in network access control in an automated fashion. ISE provides the visibility to allow intelligent decision making that gives administrators granular control. This granular control serves as a benefit when it comes to managing devices. What does Device Management look like with ISE? How do we utilize TACACS+ based AAA to give administrators granular control? This blog entry will dive into those details.
Before we jump into configuration, there are a few prerequisites in utilizing TACACS+ (ISE Device Management):
- User groups can exist within ISE or in another external source (e.g. Active Directory).
- Device Management with ISE requires that devices support TACACS+. You can utilize RADIUS and still take advantage of visibility and policies with ISE for devices that do not support TACACS+, but devices using RADIUS will consume a Base/Essentials license.
- Each Policy Service Node (PSN) requires a Device Administration license.
As a person who used to manage devices utilizing Microsoft’s NPS/RADIUS, there was not much control I had. The level of granularity was pretty tough to achieve. If I had several groups who needed different levels of access, it would take a lot of work for the setup, particularly on the network side. Granted, it was an easy setup if all I wanted was administrators to login and I did not particularly care who was going to run a command. However, I wanted more. Moving my network devices from RADIUS to TACACS+ gave me TCP instead of UDP. It gave me better security. RADIUS encrypts the password, but the rest of the communications are not encrypted. It also gave me better management through the use of ISE.
In the following tour of the Device Management setup, I am utilizing ISE 3.0. My Cisco devices sit in CML and have been configured for TACACS+. We will not be diving into the device side configuration in this blog entry. This entry also assumes you have created users within ISE or are leveraging an external source for your user directory.
Under Work Centers > Device Administration > Overviews we see a very helpful summary of everything you will be doing to get Device Administration properly configured. It was extremely helpful to me the first time I set up the lab.

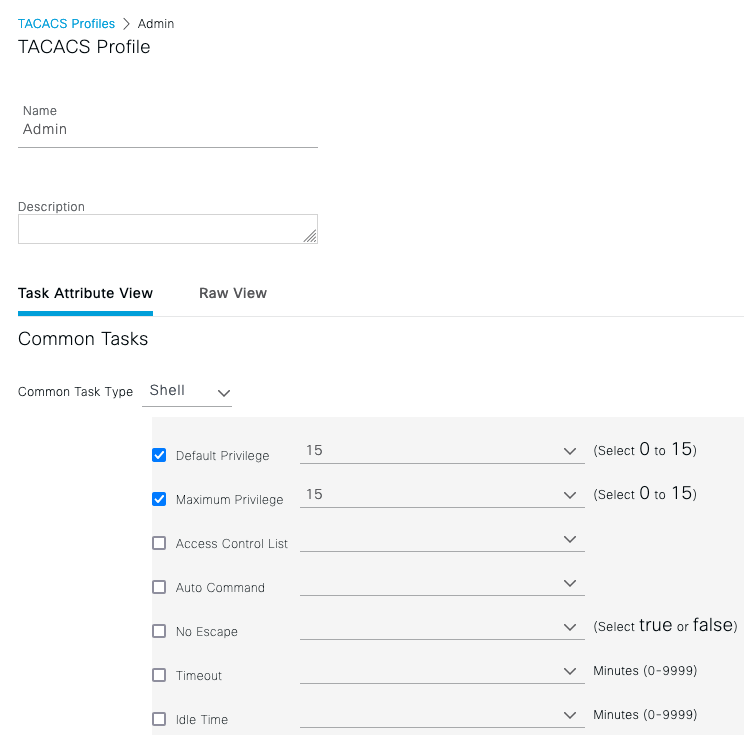
On that same page, up above, let’s go to Policy Elements > Results > TACACS Profiles. Here we can create a profile that can be assigned to a particular group who is going to login to a device. For example, if we have a Service Desk user who does not need to make changes, you will most likely not want them to have Priv 15 access to a device (“Can do everything”). The profile can be created for a Shell, Wireless LAN Controller, Nexus, and there is even a generic type. With these options, you can ensure the correct attributes are sent back to the device. For this example I am sticking with the profiles of Admin (“Can do everything”) and Read-Only (“Show commands only”).
Under Policy Elements > Results > TACACS Command Sets you can bundle up specific commands you want users in particular groups to be able to run. I might want my Service Desk to only be able to use “Show” commands. However, a supervisor or lead might need to be in a separate group so they can change VLANs on switches as needed. Here is where you can get granular. Below is a very simple example that allows a user to type “Show”.
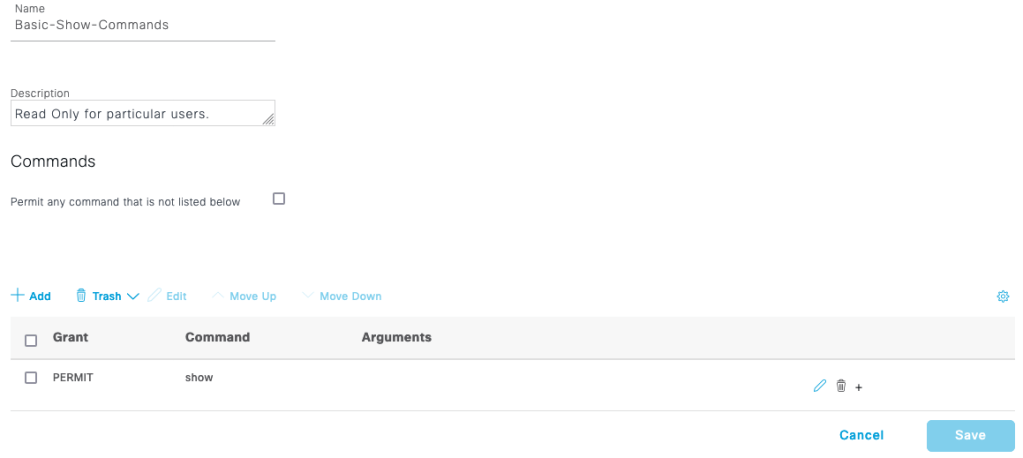
You’ll notice a checkbox that says “Permit any command not listed below”. You can easily use this to give admins the ability to use any command, by having a blank command set and checking this box. You can also use it to negate a few commands if you want a particular group to have access to all other commands.
Moving on further into our Device Administration Overview, we want to make sure our nodes are enabled for TACACS. Under the Overview tab, click on the Deployment menu item. Ensure that all of your PSNs are selected. Keep in mind, each node would require a Device Management license.

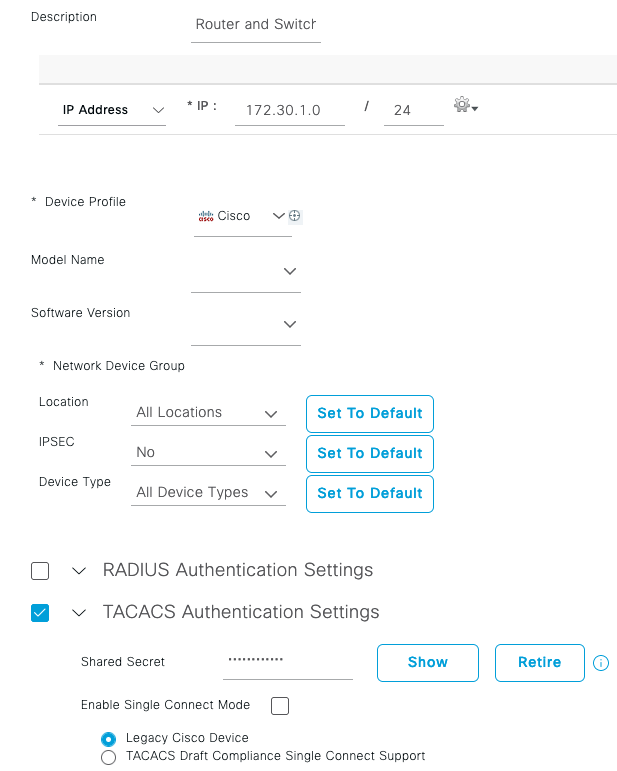
The next step in the process is to add in the devices you will be managing. Under Work Centers > Device Administration > Network Resources > Network Devices you will want to create an entry for individual devices. You can also make life easier for yourself and add in subnets if the devices to manage are on the same subnet.

If I open up the DAVNET_172.30 entry, you will see I added in the subnet the devices sit in and made sure to add in the same TACACS Shared Secret that the device is using. This needs to be correct if you want the process to work. However, notice that other options such Location can also be set. Depending on the device type, you might have to change some of the other options.
Let’s jump into the policies that will control admin users who are trying to authenticate, as well as keep out those who shouldn’t be there.
Under Device Administration > Device Admin Policy Sets I created a single policy set. The default policy set shown below denies users who do not match my created Policy Set. Here is where you can continue to ride the granularity train. If you want certain policies for certain device types or another Condition altogether, you can make that the requirement there. My example is simple, I want to just match any device type, which will match my DAVNET_172.30 entry.

Let’s open up my Lab Authentication policy. Here we see that in the Policy Set there is an Authentication Policy. My Authentication Policy is simply set to the Active Directory server I have in the lab. That is where my accounts reside that I will be trying to authenticate with. Further down comes the fun part, the Authorization Policy. Here is where we can determine who gets what access.

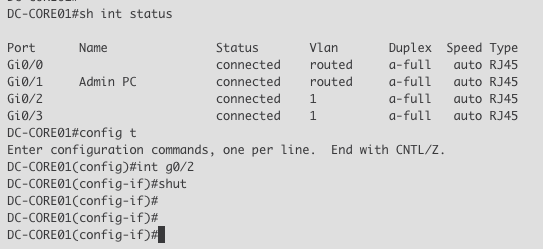
As you can see, I have three rules. The Admin rule is tied to an AD group called “IT Staff”. The Helpdesk rule is tied to an AD group called Helpdesk. Finally there is the Default rule, which all it does is Deny. If you are in the Admin AD group, and you authenticate successfully, you will be assigned the command set “Admin-Allow-All”, which does exactly that, allows all commands. I login to the device I have in CML with my admin account from Active Directory:
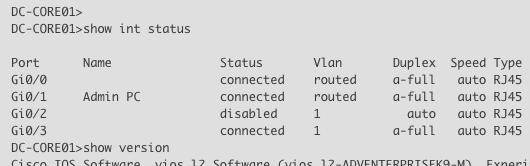
Let’s login with my Helpdesk user account, which sits in a different group that will match a different rule in the Authorization policy. For simplicity’s sake, I dump the account into the User EXEC mode. As I mentioned above, you can create command sets with certain commands that you want specific users or groups to be able to use.
What about the last A in “AAA”? Accounting? I have the devices in CML sending back to ISE all of the activities happening with these two users. This lets an administrator pull a report, perhaps for an audit. Going back to ISE, let’s look under Device Administration > Reports. I had created a report to keep track of what these two pesky users are doing while they are logged in to the infrastructure.
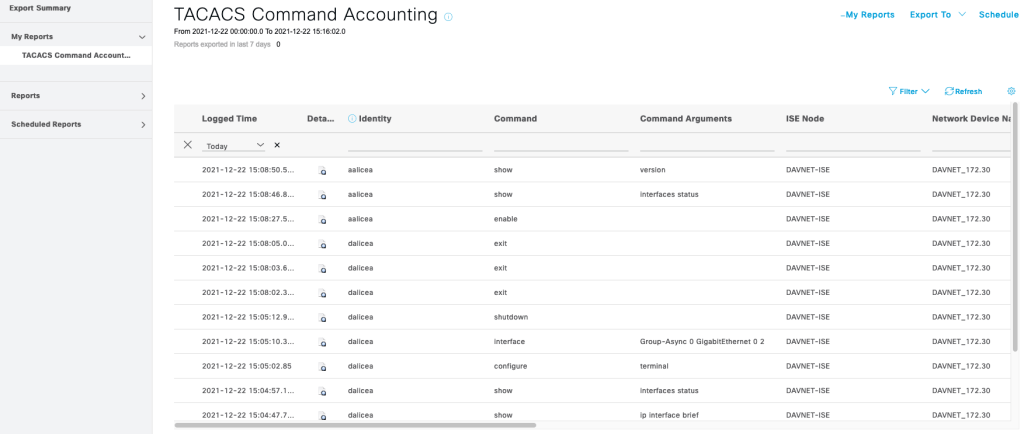
My dalicea account was able to shutdown an interface while my aalicea account was lost in User EXEC.
Cisco ISE gives me all the tools needed to properly carve out roles for my users. If you have ISE in your environment and are looking for ways to improve your security posture, why not let ISE handle Device Administration?
